craftcms / ckeditor
Edit rich text content in Craft CMS using CKEditor.
Installs: 212 843
Dependents: 29
Suggesters: 0
Security: 0
Stars: 48
Watchers: 9
Forks: 27
Open Issues: 44
Type:craft-plugin
Requires
- php: ^8.2
- craftcms/cms: ^5.6.0
- craftcms/html-field: ^3.1.0
- nystudio107/craft-code-editor: >=1.0.8 <=1.0.13 || ^1.0.16
Requires (Dev)
- craftcms/ecs: dev-main
- craftcms/phpstan: dev-main
- craftcms/rector: dev-main
- vlucas/phpdotenv: ^5.5
- 5.x-dev
- 4.x-dev
- 4.6.0
- 4.5.x-dev
- 4.5.0
- 4.4.0
- 4.3.1
- 4.3.0
- 4.2.0
- 4.1.0
- 4.0.6
- 4.0.5
- 4.0.4
- 4.0.3
- 4.0.2
- 4.0.1
- 4.0.0
- 4.0.0-beta.10
- 4.0.0-beta.9
- 4.0.0-beta.8
- 4.0.0-beta.7
- 4.0.0-beta.6
- 4.0.0-beta.5
- 4.0.0-beta.4
- 4.0.0-beta.3
- 4.0.0-beta.2
- 4.0.0-beta.1
- 3.x-dev
- 3.11.x-dev
- 3.11.1
- 3.11.0
- 3.10.0
- 3.9.0
- 3.8.3
- 3.8.2
- 3.8.1
- 3.8.0
- 3.7.3
- 3.7.2
- 3.7.1
- 3.7.0
- 3.6.0
- 3.5.1
- 3.5.0
- 3.4.0
- 3.3.0
- 3.2.1
- 3.2.0
- 3.1.0
- 3.0.0
- 2.2.0
- 2.1.0
- 2.0.0
- 2.0.0-beta.2
- 2.0.0-beta.1
- 1.5.0
- 1.4.0
- 1.3.0
- 1.2.1
- 1.2.0
- 1.1.2
- 1.1.1
- 1.1.0
- 1.0.0.1
- 1.0.0
- 1.0.0-beta.3
- 1.0.0-beta.2
- 1.0.0-beta.1
- dev-feature/365-entry-type-relabelling
- dev-bugfix/359-source-editing-groups-can-be-null
- dev-feature/331-load-provisional-drafts-when-previewing
- dev-feature/update-installation-method
- dev-feature/pt-2000-store-relations-for-images-and-linked-elements
- dev-bugfix/119-package-plugins
- dev-dependabot/npm_and_yarn/minimist-1.2.8
- dev-dependabot/npm_and_yarn/qs-6.5.3
- dev-dependabot/npm_and_yarn/decode-uri-component-0.2.2
- dev-dependabot/npm_and_yarn/minimatch-and-gulp-3.1.2
- dev-dependabot/npm_and_yarn/lodash-and-gulp--removed
- dev-dependabot/npm_and_yarn/node-sass-and-gulp-sass--removed
- dev-dependabot/npm_and_yarn/tar-and-gulp-sass--removed
- dev-dependabot/npm_and_yarn/postcss-7.0.39
- dev-dependabot/npm_and_yarn/path-parse-1.0.7
- dev-dependabot/npm_and_yarn/json-schema-and-jsprim-0.4.0
- dev-snyk-fix-b66a01f9b83f2bd8d647983a9ecf4716
- dev-snyk-upgrade-17ee821fe0e78e6c42f45bea5b63f866
- dev-snyk-fix-878865aabf3bbb2f6ba2f5b859caf875
- dev-dependabot/npm_and_yarn/browserslist-4.16.6
This package is auto-updated.
Last update: 2025-02-18 22:57:55 UTC
README
CKEditor
This plugin adds a “CKEditor” field type to Craft CMS, which provides a deeply-integrated rich text and longform content editor, powered by CKEditor 5.
Table of Contents:
- Requirements
- Installation
- Configuration
- Longform Content with Nested Entries
- Converting Redactor Fields
- Converting Matrix Fields
- Adding CKEditor Plugins
Requirements
This plugin requires Craft CMS 5.6.0 or later.
Installation
You can install this plugin from Craft’s in-app Plugin Store or with Composer.
From the Plugin Store:
Go to the Plugin Store in your project’s Control Panel and search for “CKEditor,” then click on the “Install” button in the sidebar.
With Composer:
Open your terminal and run the following commands:
# go to the project directory
cd /path/to/my-project

# tell Composer to load the plugin
composer require craftcms/ckeditor

# tell Craft to install the plugin
php craft plugin/install ckeditor
Configuration
CKEditor configs are managed globally from Settings → CKEditor.
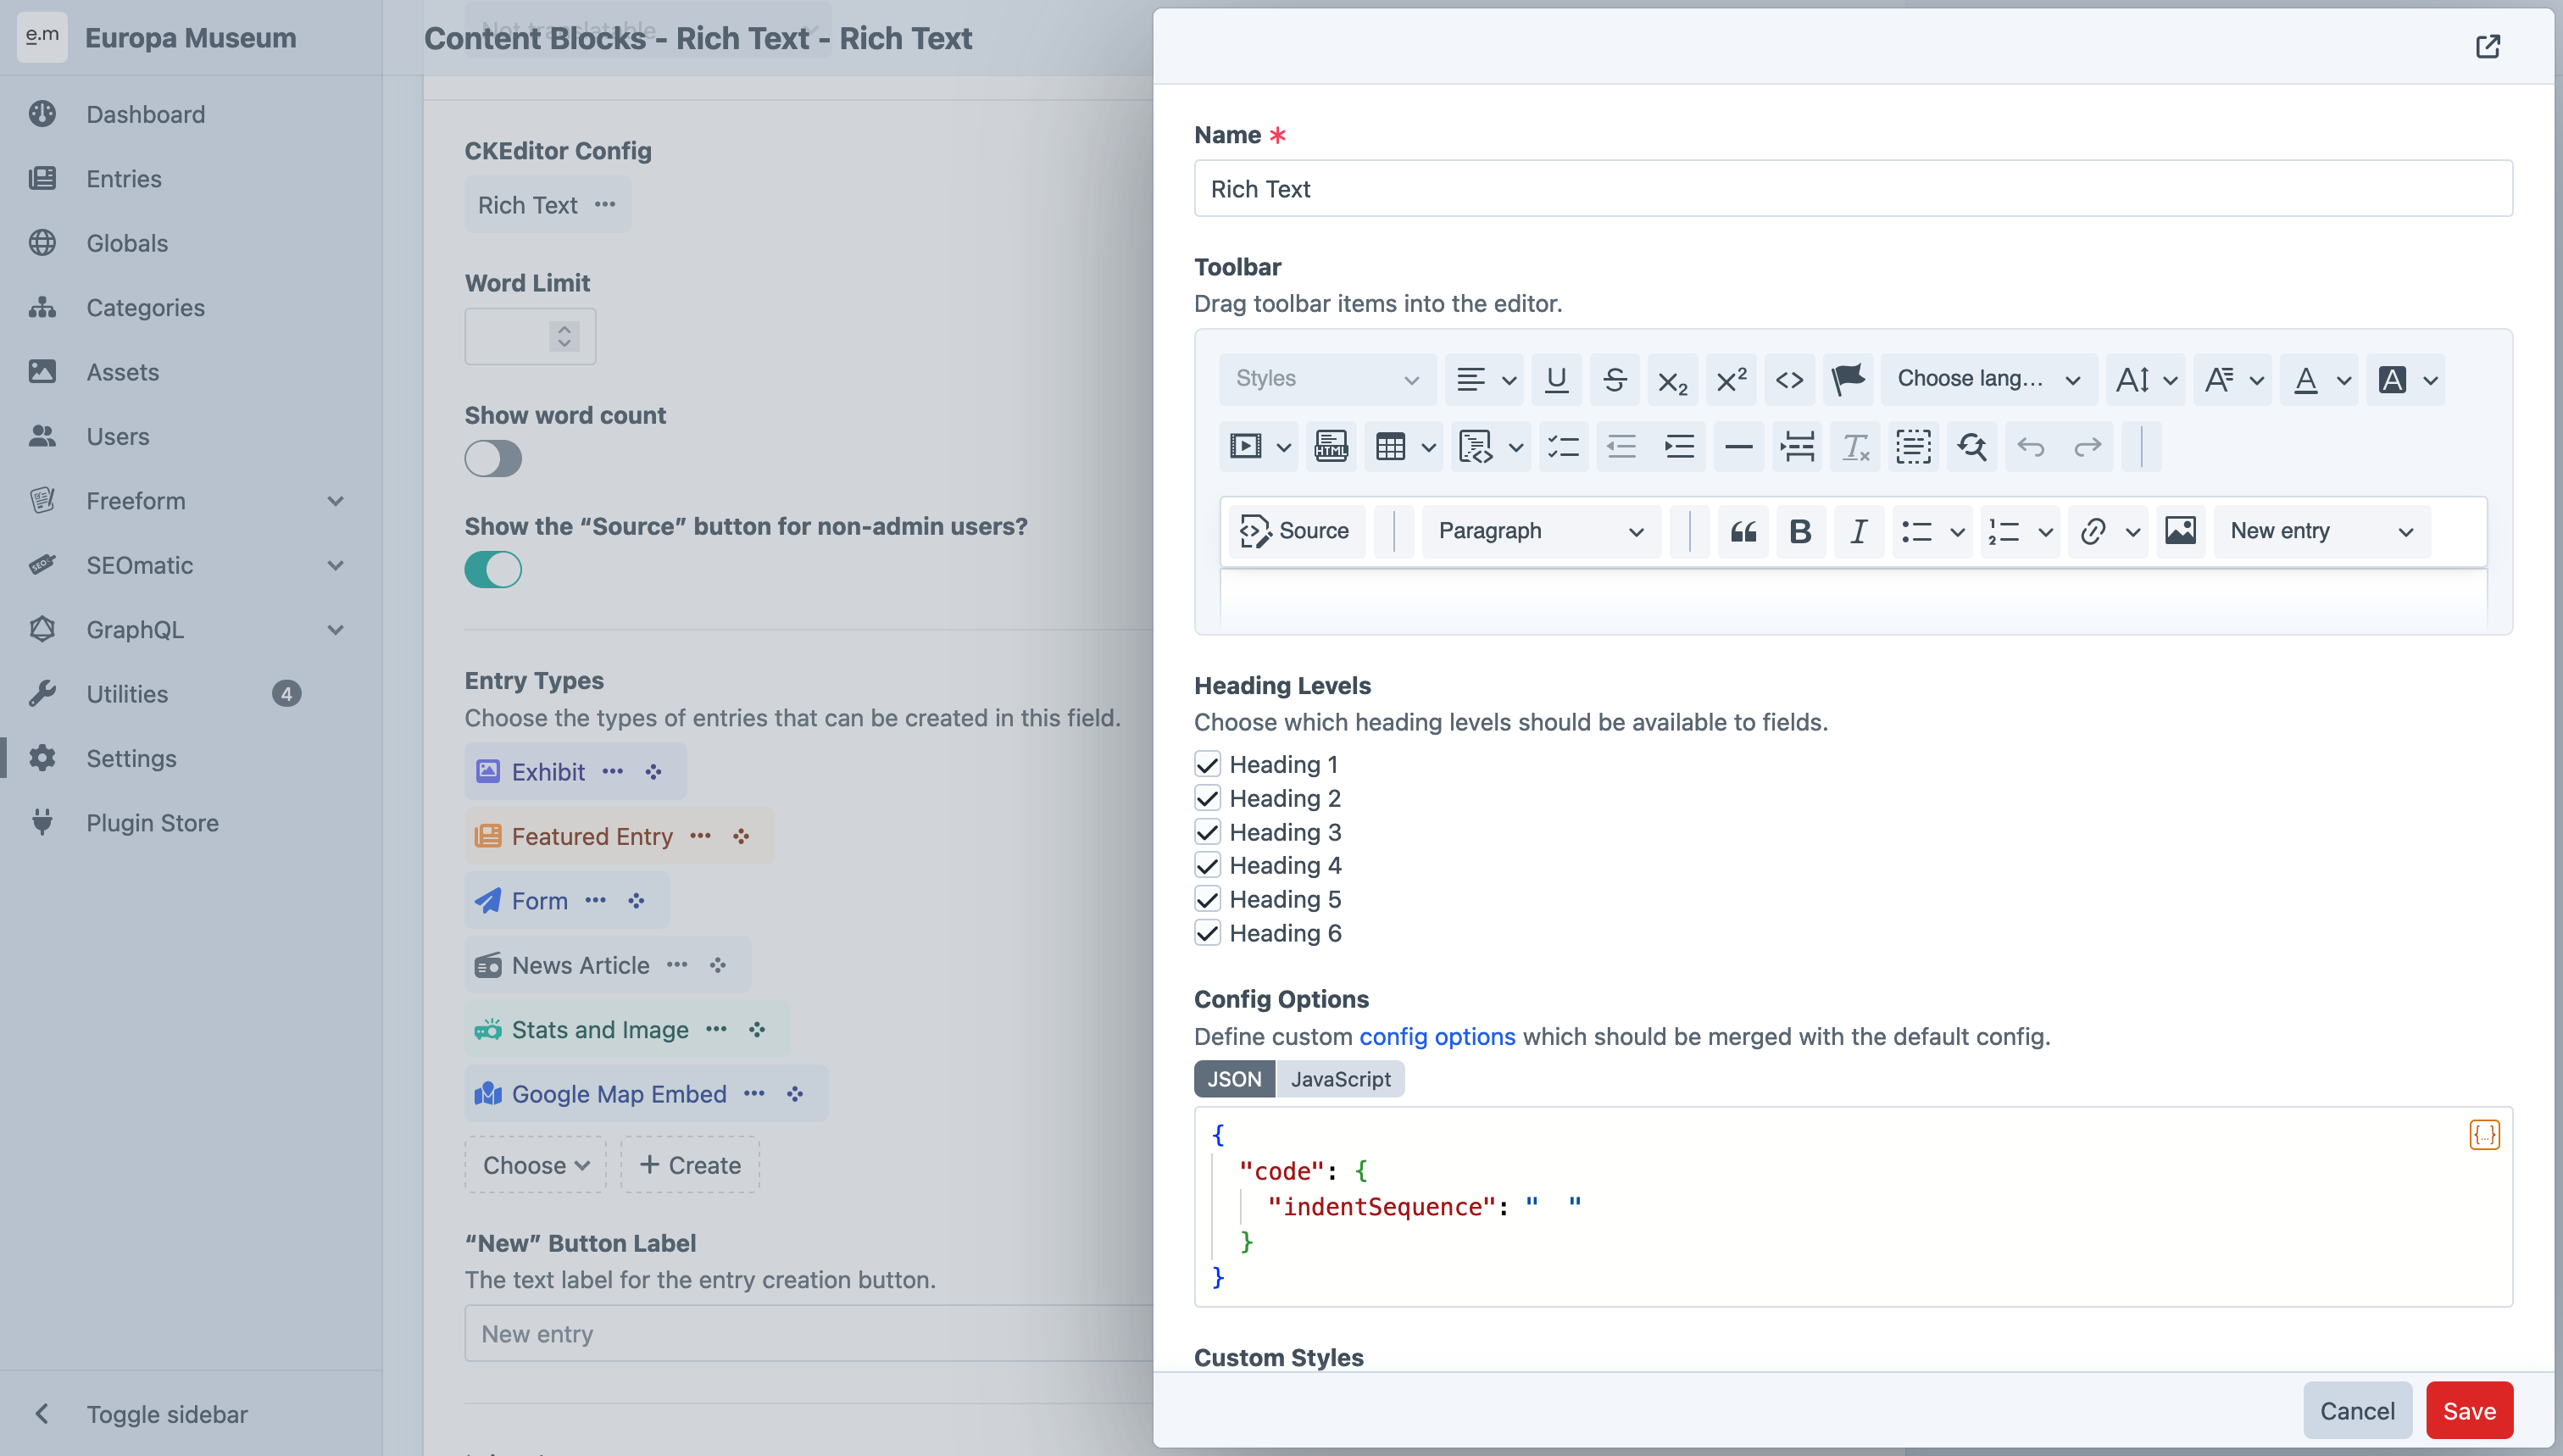
Configurations define the available toolbar buttons, as well as any custom config options and CSS styles that should be registered with the field.
New configs can also be created inline from CKEditor field settings.
Once you have selected which toolbar buttons should be available in fields using a given configuration, additional settings may be applied via Config options. Options can be defined as static JSON, or a dynamically-evaluated JavaScript snippet; the latter is used as the body of an immediately-invoked function expression, and does not receive any arguments.
Note
Available options can be found in the CKEditor's documentation. Craft will auto-complete config properties for most bundled CKEditor extensions.
Examples
Table Features
Suppose we wanted to give editors more control over the layout and appearance of in-line tables. Whenever you add the “Insert table” button to an editor, inline controls are exposed for Table Row, Table Column, and Merge. These can be supplemented with Table Properties, Table Cell Properties, and Table Caption buttons by adding them in the field’s Config options section:
{
  "table": {
    "contentToolbar": [
      "tableRow",
      "tableColumn",
      "mergeTableCells",
      "toggleTableCaption",
      "tableProperties",
      "tableCellProperties"
    ]
  }
}
Some of these additional buttons can be customized further. For example, to modify the colors available for a cell’s background (within the “Table Cell Properties” balloon), you would provide an array compatible with the TableColorConfig schema under table.tableCellProperties.backgroundColors.
External Links
Multiple configuration concerns can coexist in one Config options object! You might have a table key at the top level to customize table controls (as we've done above), as well as a link key that introduces “external” link support:
{
  "table": { /* ... */ },
  "link": {
    "decorators": {
      "openInNewTab": {
        "mode": "manual",
        "label": "Open in new tab?",
        "attributes": {
          "target": "_blank",
          "rel": "noopener noreferrer"
        }
      }
    }
  }
}
Tip
An automatic version of this feature is available natively, via the link.addTargetToExternalLinks option.
Registering Custom Styles
CKEditor’s Styles plugin makes it easy to apply custom styles to your content via CSS classes.
You can define custom styles within CKEditor configs using the style config option:
return {
  style: {
    definitions: [
      {
        name: 'Tip',
        element: 'p',
        classes: ['note']
      },
      {
        name: 'Warning',
        element: 'p',
        classes: ['note', 'note--warning']
      },
    ]
  }
}
You can then register custom CSS styles that should be applied within the editor when those styles are selected:
.ck.ck-content p.note {
    border-left: 4px solid #4a7cf6;
    padding-left: 1rem;
    color: #4a7cf6;
}

.ck.ck-content p.note--warning {
    border-left-color: #e5422b;
    color: #e5422b;
}
HTML Purifier Configs
CKEditor fields use HTML Purifier to ensure that no malicious code makes it into its field values, to prevent XSS attacks and other vulnerabilities.
You can create custom HTML Purifier configs that will be available to your CKEditor fields. They should be created as JSON files in your config/htmlpurifier/ folder.
Use this as a starting point, which is the default config that CKEditor fields use if no custom HTML Purifier config is selected:
{
  "Attr.AllowedFrameTargets": [
    "_blank"
  ],
  "Attr.EnableID": true
}
See the HTML Purifier documentation for a list of available config options.
For advanced customization, you can modify the HTMLPurifier_Config object directly via the craft\ckeditor\Field::EVENT_MODIFY_PURIFIER_CONFIG event.
use craft\htmlfield\events\ModifyPurifierConfigEvent;
use craft\ckeditor\Field;
use HTMLPurifier_Config;
use yii\base\Event;

Event::on(
    Field::class,
    Field::EVENT_MODIFY_PURIFIER_CONFIG,
    function(ModifyPurifierConfigEvent $event) {
        /** @var HTMLPurifier_Config $config */
        $config = $event->config;
        // ...
    }
);
Embedding Media
CKEditor 5 stores references to embedded media embeds using oembed tags. Craft CMS configures HTML Purifier to support these tags, however you will need to ensure that the URI.SafeIframeRegexp HTML Purifier setting is set to allow any domains you wish to embed content from.
See CKEditor’s media embed documentation for examples of how to show the embedded media on your front end.
Longform Content with Nested Entries
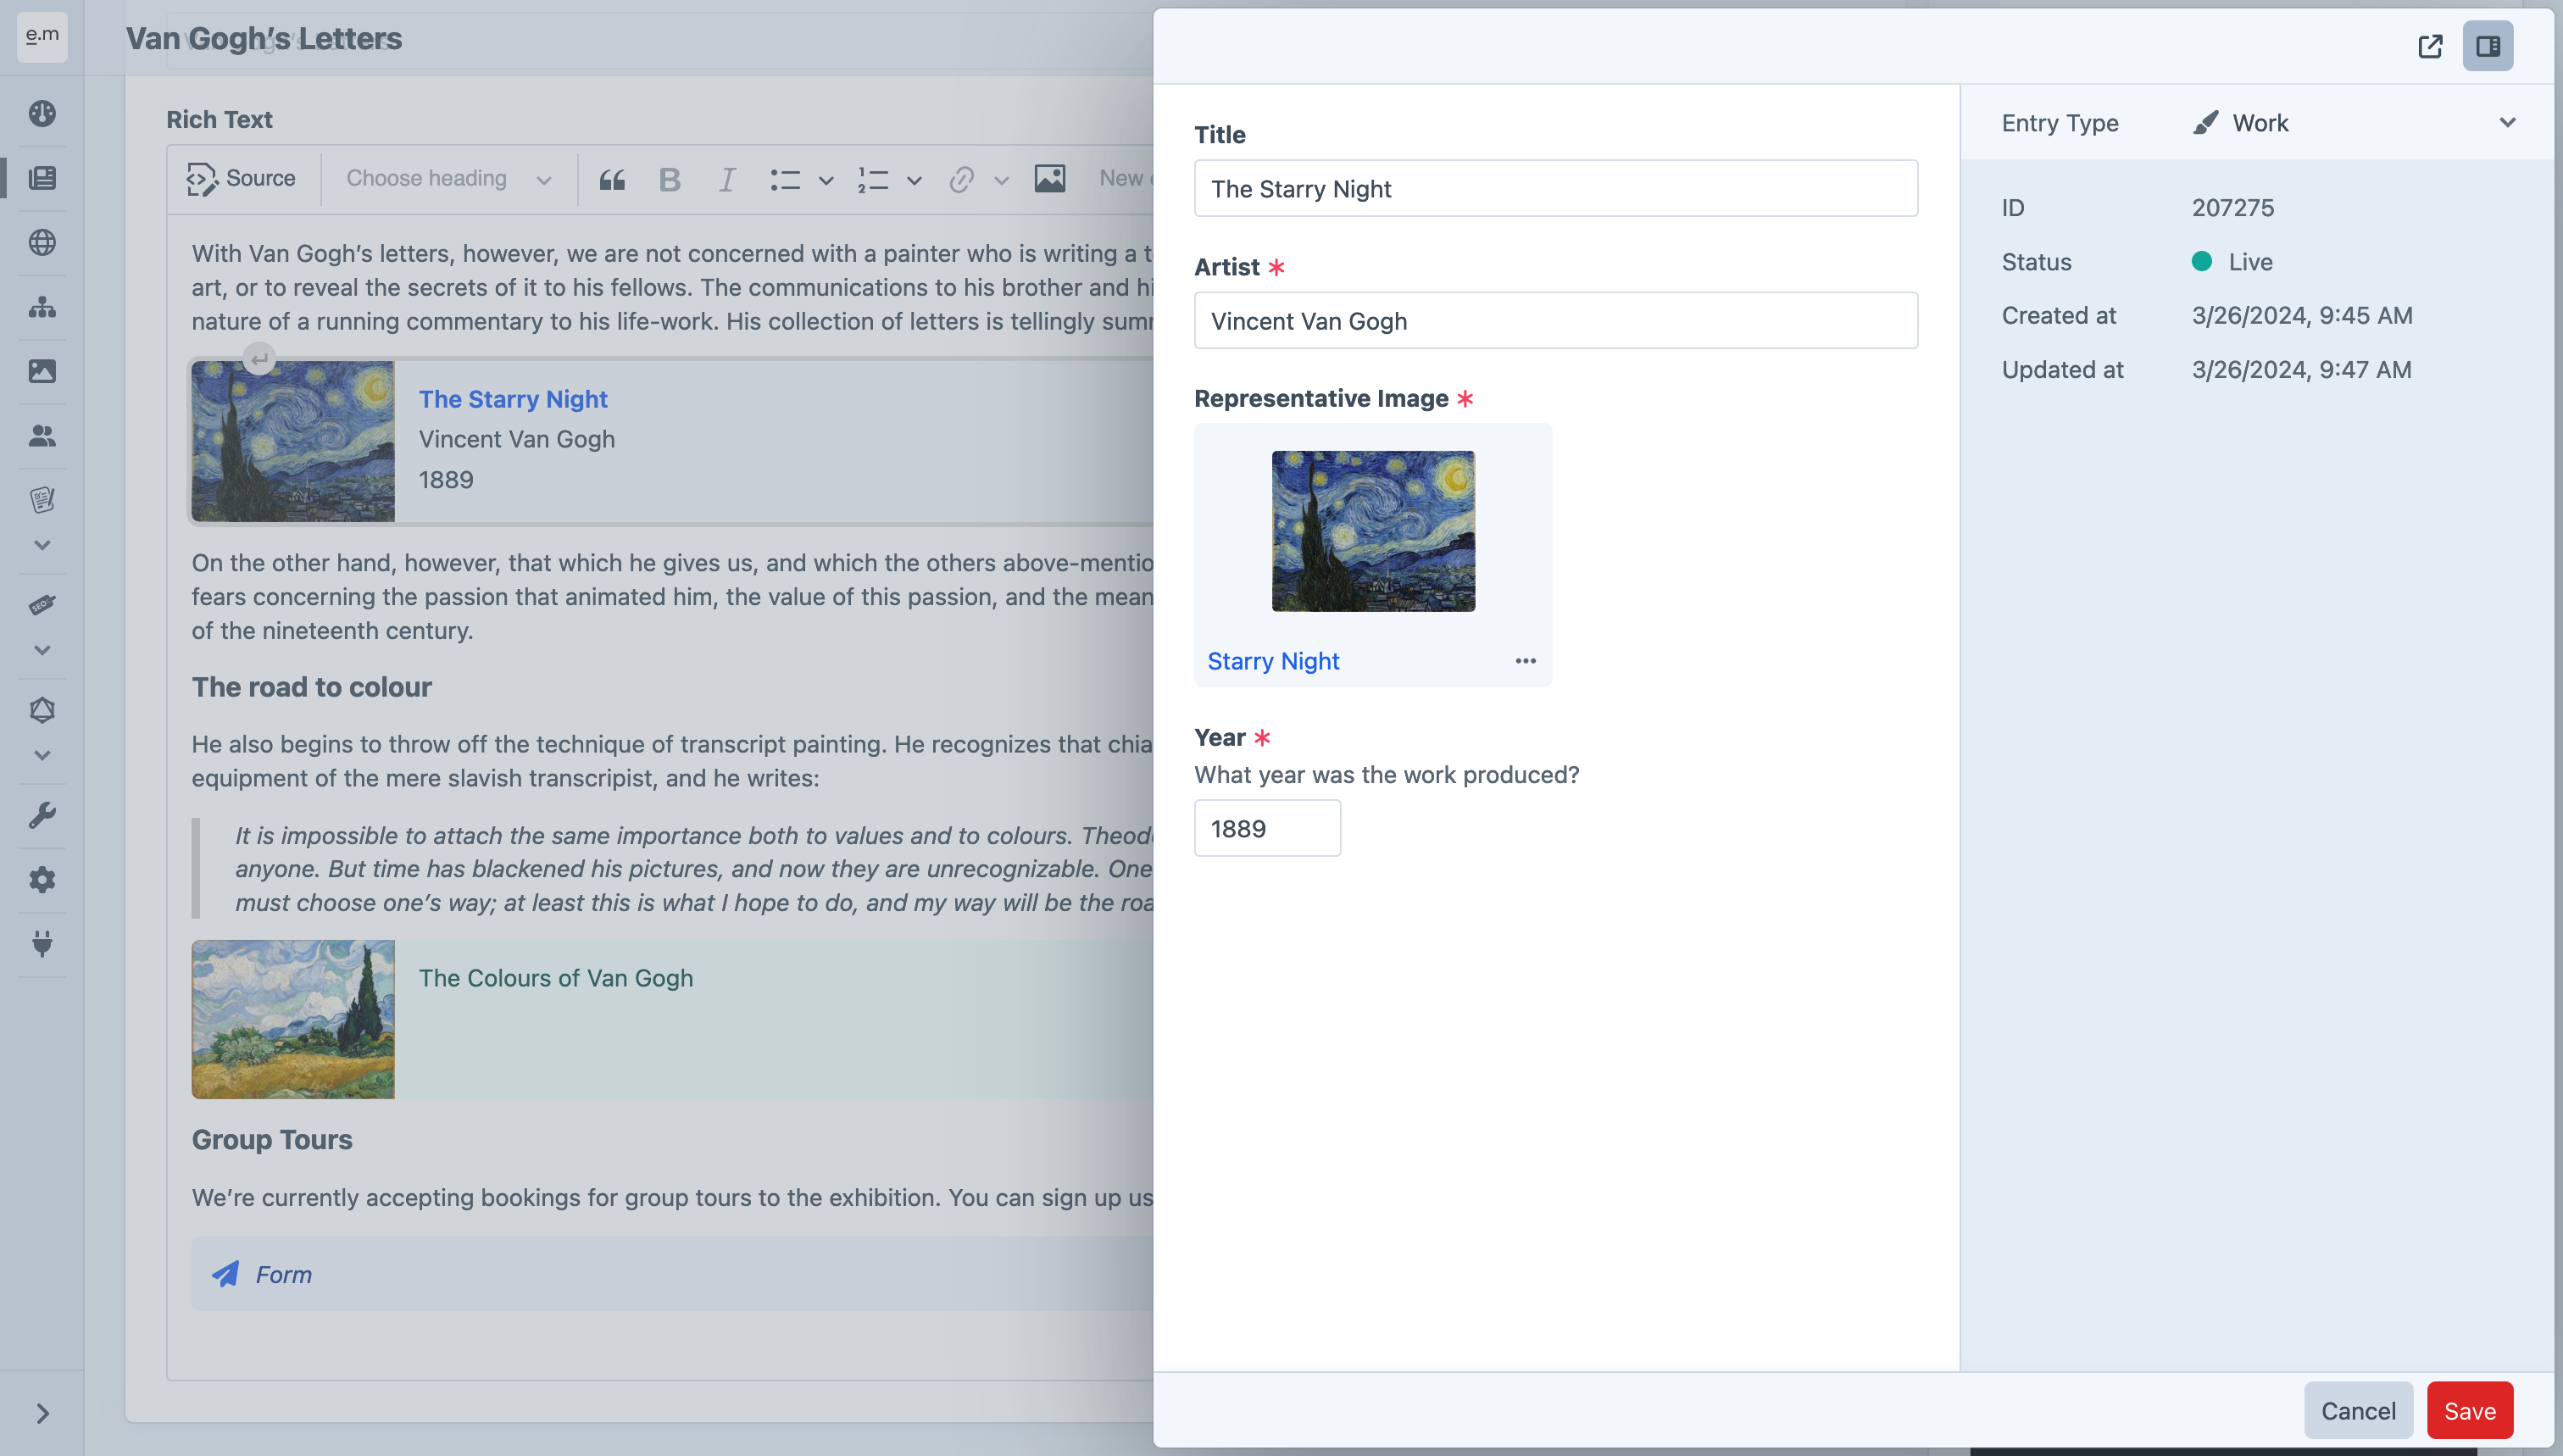
CKEditor fields can be configured to manage nested entries, which will be displayed as cards within your rich text content, and edited via slideouts.
Nested entries can be created anywhere within your content, and they can be moved, copied, and deleted, just like images and embedded media.
Setup
To configure a CKEditor field to manage nested entries, follow these steps:
- Go to Settings → Fields and click on your CKEditor field’s name (or create a new one).
- Double-click on the selected CKEditor config to open its settings.
- Drag the “New entry” menu button into the toolbar, and save the CKEditor config.
- Back on the field’s settings, select one or more entry types which should be available within CKEditor fields.
- Save the field’s settings.
Now the field is set up to manage nested entries! The next time you edit an element with that CKEditor field, the “New entry” menu button will be shown in the toolbar, and when you choose an entry type from it, a slideout will open where you can enter content for the nested entry.
An entry card will appear within the rich text content after you press Save within the slideout. The card can be moved via drag-n-drop or cut/paste from there.
You can also copy/paste the card to duplicate the nested entry.
To delete the nested entry, simply select it and press the Delete key.
Note
Copy/pasting entry cards across separate CKEditor fields is not supported.
Rendering Nested Entries on the Front End
On the front end, nested entries will be rendered automatically via their partial templates.
For each entry type selected by your CKEditor field, create a _partials/entry/<entryTypeHandle>.twig file within your templates/ folder, and place your template code for the entry type within it.
An entry variable will be available to the template, which references the entry being rendered.
Tip
If your nested entries contain any relation fields, you can eager-load their related elements for each of the CKEditor field’s nested entries using eagerly().
{% for image in entry.myAssetsField.eagerly().all() %}
Rendering Chunks
CKEditor field content is represented by an object that can be output as a string ({{ entry.myCkeditorField }}), or used like an array:
{% for chunk in entry.myCkeditorField %}
  <div class="chunk {{ chunk.type }}">
    {{ chunk }}
  </div>
{% endfor %}
“Chunks” have two types: markup, containing CKEditor HTML; and entry, representing a single nested entry. Adjacent markup chunks are collapsed into one another in cases where the nested entry is disabled.
This example treats both chunk types as strings. For entry chunks, this is equivalent to calling {{ entry.render() }}. If you would like to customize the data passed to the element partial, or use a different representation of the entry entirely, you have access to the nested entry via chunk.entry:
{% for chunk in entry.myCkeditorField %}
  {% if chunk.type == 'markup' %}
    <div class="chunk markup">
      {{ chunk }}
    </div>
  {% else %}
    <div class="chunk entry" data-entry-id="{{ chunk.entry.id }}">
      {# Call the render() method with custom params... #}
      {{ chunk.entry.render({
        isRss: true,
      }) }}

      {# ...or provide completely custom HTML for each supported entry type! #}
      {% switch chunk.entry.type.handle %}
        {% case 'gallery' %}
          {% set slides = chunk.entry.slides.eagerly().all() %}
          {% for slide in slides %}
            <figure>
              {# ... #}
            </figure>
        {% case 'document' %}
          {% set doc = chunk.entry.attachment.eagerly().one() %}

          <a href="{{ doc.url }}" download>Download {{ doc.filename }}</a> ({{ doc.size|filesize }})
        {% default %}
          {# For anything else: #}
          {{ chunk.entry.render() }}
      {% endswitch %}
    </div>
  {% endif %}
{% endfor %}
Converting Redactor Fields
You can use the ckeditor/convert/redactor command to convert any existing Redactor fields over to CKEditor. For each unique Redactor config, a new CKEditor config will be created and associated with the appropriate field(s).
The command will make changes to your project config. You should commit them, and run craft up on other environments for the changes to take effect.
php craft ckeditor/convert/redactor
Converting Matrix Fields
You can use the ckeditor/convert/matrix command to convert a Matrix field over to CKEditor. Each of the Matrix field’s entry types will be assigned to the CKEditor field, and field values will be a mix of HTML content extracted from one of the nested entry types of your choosing (if desired) combined with nested entries.
php craft ckeditor/convert/matrix <myMatrixFieldHandle>
The command will generate a new content migration, which will need to be run on other environments (via craft up) in order to update existing elements’ field values.
Adding CKEditor Plugins
Craft CMS plugins can register additional CKEditor plugins to extend its functionality.
The first step is to create a DLL-compatible package which provides the CKEditor plugin(s) you wish to add.
- If you’re including one of CKEditor’s first-party packages, it will already include a
builddirectory with a DLL-compatible package inside it. - If you’re creating a custom CKEditor plugin, use CKEditor’s package generator to scaffold it, and run its
dll:buildcommand to create a DLL-compatible package.
Tip
Check out CKEditor’s Implementing an inline widget tutorial for an in-depth look at how to create a custom CKEditor plugin.
Once the CKEditor package is in place in your Craft plugin, create an asset bundle which extends BaseCkeditorPackageAsset. The asset bundle defines the package’s build directory, filename, a list of CKEditor plugin names provided by the package, and any toolbar items that should be made available via the plugin.
For example, here’s an asset bundle which defines a “Tokens” plugin:
<?php

namespace mynamespace\web\assets\tokens;

use craft\ckeditor\web\assets\BaseCkeditorPackageAsset;

class TokensAsset extends BaseCkeditorPackageAsset
{
    public $sourcePath = __DIR__ . '/build';

    public $js = [
        'tokens.js',
    ];

    public array $pluginNames = [
        'Tokens',
    ];

    public array $toolbarItems = [
        'tokens',
    ];
}
Finally, ensure your asset bundle is registered whenever the core CKEditor asset bundle is. Add the following code to your plugin’s init() method:
\craft\ckeditor\Plugin::registerCkeditorPackage(TokensAsset::class);


